클로드 테스트를 해봤는데 아주 예전 지식만 알고 있더군요.
[code]
<!DOCTYPE html>
<html lang="ko">
<head>
<meta charset="UTF-8">
<meta name="viewport" content="width=device-width, initial-scale=1.0">
<title>오버워치2 & 배틀그라운드 에임 설정 가이드</title>
<style>
* {
margin: 0;
padding: 0;
box-sizing: border-box;
font-family: 'Noto Sans KR', sans-serif;
}
body {
background-color: #f0f2f5;
color: #333;
line-height: 1.6;
}
.container {
max-width: 1200px;
margin: 0 auto;
padding: 20px;
}
header {
background: linear-gradient(135deg, #1a73e8, #8e44ad);
color: white;
padding: 30px 0;
text-align: center;
border-radius: 10px;
margin-bottom: 30px;
box-shadow: 0 4px 6px rgba(0, 0, 0, 0.1);
}
h1 {
font-size: 2.5rem;
margin-bottom: 10px;
}
.tabs {
display: flex;
justify-content: center;
margin-bottom: 30px;
}
.tab-btn {
padding: 15px 30px;
margin: 0 10px;
background-color: #f8f9fa;
border: none;
border-radius: 25px;
cursor: pointer;
font-size: 1.1rem;
font-weight: 600;
transition: all 0.3s ease;
box-shadow: 0 2px 4px rgba(0, 0, 0, 0.1);
}
.tab-btn:hover {
background-color: #e9ecef;
transform: translateY(-2px);
}
.tab-btn.active {
background-color: #4c6ef5;
color: white;
}
.content {
display: none;
animation: fadeIn 0.5s ease;
}
.content.active {
display: block;
}
@keyframes fadeIn {
from { opacity: 0; }
to { opacity: 1; }
}
.setting-card {
background-color: white;
border-radius: 10px;
padding: 25px;
margin-bottom: 25px;
box-shadow: 0 2px 10px rgba(0, 0, 0, 0.05);
}
h2 {
font-size: 1.8rem;
margin-bottom: 15px;
color: #4c6ef5;
}
h3 {
font-size: 1.4rem;
margin: 20px 0 10px;
color: #5f6368;
}
p {
margin-bottom: 15px;
}
ul, ol {
margin-left: 20px;
margin-bottom: 15px;
}
li {
margin-bottom: 8px;
}
.calculator {
background-color: #e9ecef;
padding: 20px;
border-radius: 10px;
margin-top: 30px;
}
label {
display: block;
margin-bottom: 8px;
font-weight: 600;
}
input[type="number"], select {
width: 100%;
padding: 10px;
margin-bottom: 15px;
border: 1px solid #ddd;
border-radius: 5px;
}
button {
background-color: #4c6ef5;
color: white;
border: none;
padding: 10px 20px;
border-radius: 5px;
cursor: pointer;
font-size: 1rem;
font-weight: 600;
transition: background-color 0.3s ease;
}
button:hover {
background-color: #3b5bdb;
}
.result {
margin-top: 20px;
padding: 15px;
background-color: #f8f9fa;
border-radius: 5px;
border-left: 4px solid #4c6ef5;
}
.tips {
background-color: #e7f5ff;
padding: 15px;
border-radius: 8px;
margin: 20px 0;
border-left: 4px solid #1971c2;
}
.warning {
background-color: #fff5f5;
padding: 15px;
border-radius: 8px;
margin: 20px 0;
border-left: 4px solid #fa5252;
}
table {
width: 100%;
border-collapse: collapse;
margin: 20px 0;
}
th, td {
padding: 12px 15px;
text-align: left;
border-bottom: 1px solid #ddd;
}
th {
background-color: #f1f3f5;
font-weight: 600;
}
tr:hover {
background-color: #f8f9fa;
}
.pro-settings {
margin-top: 30px;
}
.pro-player {
display: flex;
align-items: center;
padding: 15px;
border: 1px solid #ddd;
border-radius: 8px;
margin-bottom: 15px;
}
.pro-player img {
width: 60px;
height: 60px;
border-radius: 50%;
margin-right: 15px;
object-fit: cover;
}
.pro-player-info {
flex: 1;
}
.pro-player-name {
font-weight: 600;
font-size: 1.1rem;
margin-bottom: 5px;
}
footer {
text-align: center;
margin-top: 50px;
padding: 20px 0;
color: #6c757d;
font-size: 0.9rem;
}
</style>
</head>
<body>
<div class="container">
<header>
<h1>오버워치2 & 배틀그라운드 에임 설정 가이드</h1>
<p>최적의 에임 설정으로 게임 실력 향상하기</p>
</header>
<div class="tabs">
<button class="tab-btn active" data-tab="overwatch">오버워치2</button>
<button class="tab-btn" data-tab="pubg">배틀그라운드</button>
</div>
<!-- 오버워치2 내용 -->
<div id="overwatch" class="content active">
<div class="setting-card">
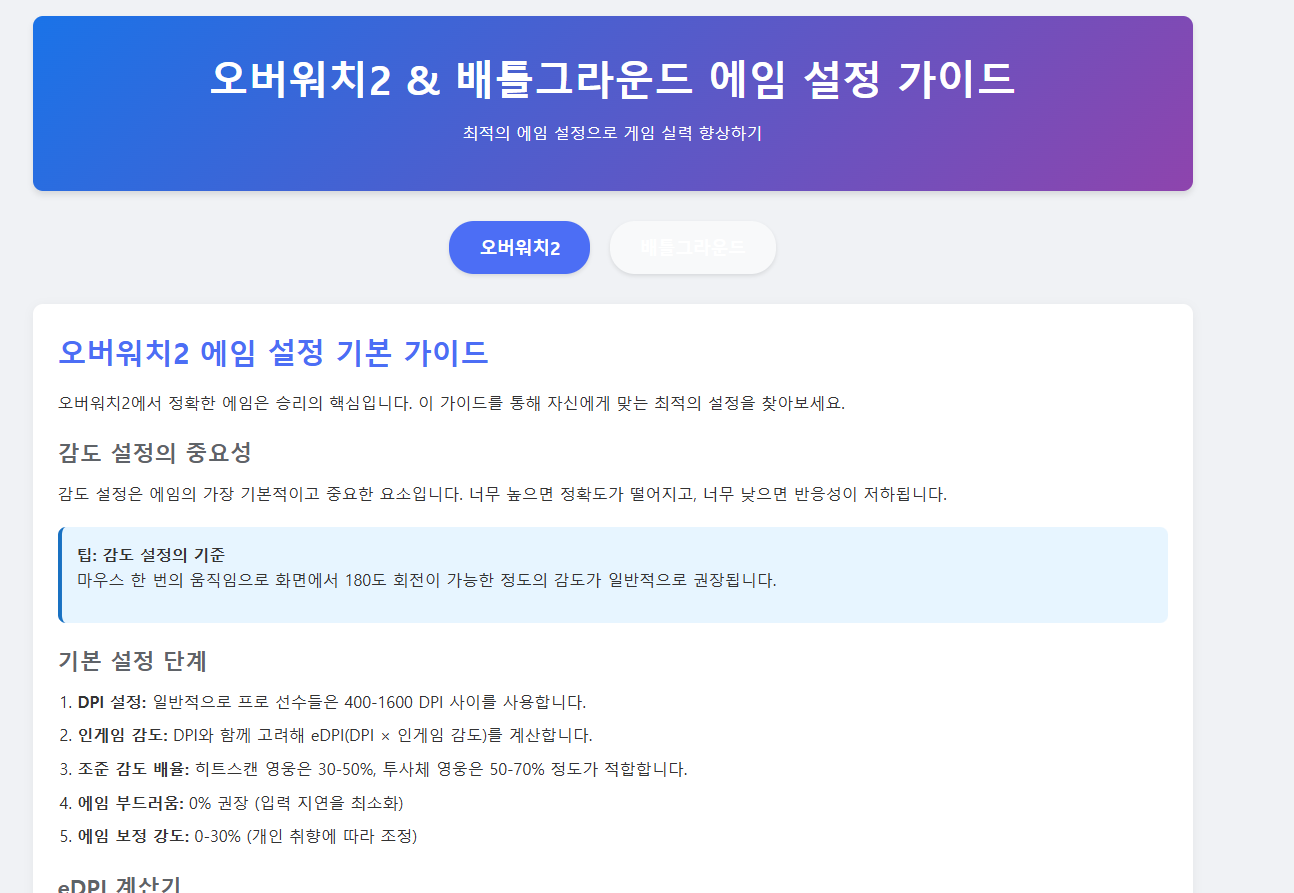
<h2>오버워치2 에임 설정 기본 가이드</h2>
<p>오버워치2에서 정확한 에임은 승리의 핵심입니다. 이 가이드를 통해 자신에게 맞는 최적의 설정을 찾아보세요.</p>
<h3>감도 설정의 중요성</h3>
<p>감도 설정은 에임의 가장 기본적이고 중요한 요소입니다. 너무 높으면 정확도가 떨어지고, 너무 낮으면 반응성이 저하됩니다.</p>
<div class="tips">
<h4>팁: 감도 설정의 기준</h4>
<p>마우스 한 번의 움직임으로 화면에서 180도 회전이 가능한 정도의 감도가 일반적으로 권장됩니다.</p>
</div>
<h3>기본 설정 단계</h3>
<ol>
<li><strong>DPI 설정:</strong> 일반적으로 프로 선수들은 400-1600 DPI 사이를 사용합니다.</li>
<li><strong>인게임 감도:</strong> DPI와 함께 고려해 eDPI(DPI × 인게임 감도)를 계산합니다.</li>
<li><strong>조준 감도 배율:</strong> 히트스캔 영웅은 30-50%, 투사체 영웅은 50-70% 정도가 적합합니다.</li>
<li><strong>에임 부드러움:</strong> 0% 권장 (입력 지연을 최소화)</li>
<li><strong>에임 보정 강도:</strong> 0-30% (개인 취향에 따라 조정)</li>
</ol>
<h3>eDPI 계산기</h3>
<div class="calculator">
<label for="ow-dpi">마우스 DPI:</label>
<input type="number" id="ow-dpi" min="100" max="3200" value="800">
<label for="ow-sens">인게임 감도:</label>
<input type="number" id="ow-sens" min="0.1" max="30" step="0.1" value="5">
<button onclick="calculateOwEdpi()">eDPI 계산하기</button>
<div id="ow-edpi-result" class="result">eDPI: 4000 (일반적인 범위: 3000-6000)</div>
</div>
</div>
<div class="setting-card">
<h2>영웅별 최적 에임 설정</h2>
<h3>히트스캔 영웅 (솔저: 76, 위도우메이커, 맥크리(캐서디))</h3>
<table>
<thead>
<tr>
<th>설정</th>
<th>권장 값</th>
<th>설명</th>
</tr>
</thead>
<tbody>
<tr>
<td>인게임 감도</td>
<td>3-6</td>
<td>정밀한 조준을 위해 낮은 감도 권장</td>
</tr>
<tr>
<td>조준 감도 배율</td>
<td>35-45%</td>
<td>조준 시 더욱 정확한 에임 가능</td>
</tr>
<tr>
<td>에임 보정 강도</td>
<td>0-20%</td>
<td>낮을수록 더 순수한 에임 의존</td>
</tr>
</tbody>
</table>
<h3>투사체 영웅 (파라, 한조, 정크랫)</h3>
<table>
<thead>
<tr>
<th>설정</th>
<th>권장 값</th>
<th>설명</th>
</tr>
</thead>
<tbody>
<tr>
<td>인게임 감도</td>
<td>5-8</td>
<td>빠른 반응성 위주</td>
</tr>
<tr>
<td>조준 감도 배율</td>
<td>50-65%</td>
<td>더 빠른 조준 전환 가능</td>
</tr>
<tr>
<td>에임 보정 강도</td>
<td>0-10%</td>
<td>투사체는 보정이 거의 불필요</td>
</tr>
</tbody>
</table>
<h3>추적 기반 영웅 (트레이서, 솜브라, 자리야)</h3>
<table>
<thead>
<tr>
<th>설정</th>
<th>권장 값</th>
<th>설명</th>
</tr>
</thead>
<tbody>
<tr>
<td>인게임 감도</td>
<td>6-10</td>
<td>적 추적에 적합한 중간-높은 감도</td>
</tr>
<tr>
<td>조준 감도 배율</td>
<td>45-55%</td>
<td>균형 잡힌 조준 경험</td>
</tr>
<tr>
<td>에임 보정 강도</td>
<td>15-30%</td>
<td>약간의 보정으로 추적 정확도 향상</td>
</tr>
</tbody>
</table>
</div>
<div class="setting-card">
<h2>고급 에임 설정 팁</h2>
<h3>크로스헤어 설정</h3>
<p>자신에게 맞는 크로스헤어를 선택하는 것도 중요합니다:</p>
<ul>
<li><strong>크로스헤어 유형:</strong> 십자형이나 점형이 가장 인기 있습니다.</li>
<li><strong>크기:</strong> 화면을 가리지 않는 작은 크기가 권장됩니다.</li>
<li><strong>색상:</strong> 밝은 초록색이나 핑크색이 대부분의<li><strong>색상:</strong> 밝은 초록색이나 핑크색이 대부분의 맵 배경과 대비되어 잘 보입니다.</li>
<li><strong>두께:</strong> 1-2픽셀이 적당합니다.</li>
</ul>
<h3>프레임 제한 및 그래픽 설정</h3>
<p>에임 정확도를 위해 안정적인 프레임률이 중요합니다:</p>
<ul>
<li>화면 주사율보다 약간 높은 FPS 제한을 설정하세요 (예: 144Hz 모니터라면 160-180 FPS)</li>
<li>일정한 프레임률을 유지하기 위해 그래픽 설정을 낮추는 것이 좋습니다.</li>
<li>감도에 영향을 미치는 '향상된 포인터 정밀도' 옵션은 Windows 설정에서 비활성화하세요.</li>
</ul>
<h3>에임 훈련 방법</h3>
<p>설정만으로는 부족합니다. 지속적인 훈련이 필요합니다:</p>
<ol>
<li><strong>사격 연습장:</strong> 매일 10-15분간 봇을 상대로 연습하세요.</li>
<li><strong>맞춤 게임:</strong> 에임 훈련용 맞춤 게임 코드를 활용하세요. (코드: KAVE5, VAXTA)</li>
<li><strong>꾸준함:</strong> 매일 조금씩이라도 연습하는 것이 한 번에 많이 하는 것보다 효과적입니다.</li>
</ol>
<div class="warning">
<h4>주의사항</h4>
<p>다른 프로의 설정을 그대로 복사하는 것보다 자신에게 맞는 설정을 찾는 것이 중요합니다. 이 가이드는 시작점일 뿐입니다.</p>
</div>
<h3>프로 선수들의 설정</h3>
<div class="pro-settings">
<div class="pro-player">
<img src="/api/placeholder/60/60" alt="프로 선수">
<div class="pro-player-info">
<div class="pro-player-name">Carpe (DPS)</div>
<p>DPI: 900 | 감도: 4.5 | eDPI: 4050 | 조준 감도: 40%</p>
</div>
</div>
<div class="pro-player">
<img src="/api/placeholder/60/60" alt="프로 선수">
<div class="pro-player-info">
<div class="pro-player-name">JJonak (Support)</div>
<p>DPI: 800 | 감도: 3.7 | eDPI: 2960 | 조준 감도: 38%</p>
</div>
</div>
<div class="pro-player">
<img src="/api/placeholder/60/60" alt="프로 선수">
<div class="pro-player-info">
<div class="pro-player-name">Space (Tank)</div>
<p>DPI: 800 | 감도: 5.5 | eDPI: 4400 | 조준 감도: 45%</p>
</div>
</div>
</div>
</div>
</div>
<!-- 배틀그라운드 내용 -->
<div id="pubg" class="content">
<div class="setting-card">
<h2>배틀그라운드 에임 설정 기본 가이드</h2>
<p>배틀그라운드에서 에임은 생존과 직결됩니다. 여기서는 다양한 상황에 맞는 에임 설정을 알아봅니다.</p>
<h3>감도 설정의 이해</h3>
<p>배틀그라운드는 여러 조준 모드(일반, ADS, 스코프별)에 대한 개별적인 감도 설정이 필요합니다.</p>
<div class="tips">
<h4>팁: 배틀그라운드의 감도 시스템</h4>
<p>배틀그라운드의 감도는 0-100 사이의 값으로, 낮을수록 마우스 움직임에 덜 민감합니다.</p>
</div>
<h3>기본 설정 가이드</h3>
<ol>
<li><strong>DPI 설정:</strong> 400-800 DPI가 일반적으로 권장됩니다.</li>
<li><strong>일반 감도:</strong> 35-50 정도가 적당합니다.</li>
<li><strong>ADS 감도:</strong> 일반 감도의 0.7-1.0배 정도로 설정하세요.</li>
<li><strong>스코프 감도:</strong> 배율이 높을수록 낮은 감도가 필요합니다.</li>
<li><strong>수직 감도 배율:</strong> 1.0-1.2 정도가 리코일 제어에 효과적입니다.</li>
</ol>
<h3>감도 계산기</h3>
<div class="calculator">
<label for="pubg-dpi">마우스 DPI:</label>
<input type="number" id="pubg-dpi" min="100" max="3200" value="800">
<label for="pubg-sens">일반 감도:</label>
<input type="number" id="pubg-sens" min="1" max="100" value="40">
<label for="pubg-scope">스코프 유형:</label>
<select id="pubg-scope">
<option value="1">일반/ADS</option>
<option value="2">2x 스코프</option>
<option value="3">3x 스코프</option>
<option value="4">4x 스코프</option>
<option value="6">6x 스코프</option>
<option value="8">8x 스코프</option>
</select>
<button onclick="calculatePubgSens()">권장 감도 계산하기</button>
<div id="pubg-sens-result" class="result">권장 감도: 계산 중...</div>
</div>
</div>
<div class="setting-card">
<h2>무기 유형별 최적 에임 설정</h2>
<h3>돌격 소총 (AR)</h3>
<table>
<thead>
<tr>
<th>설정</th>
<th>권장 값</th>
<th>설명</th>
</tr>
</thead>
<tbody>
<tr>
<td>일반 감도</td>
<td>35-45</td>
<td>중거리 교전에 적합한 감도</td>
</tr>
<tr>
<td>ADS 감도</td>
<td>30-40</td>
<td>조준 시 안정적인 에임 유지</td>
</tr>
<tr>
<td>수직 감도 배율</td>
<td>1.1-1.3</td>
<td>수직 반동 제어에 유리</td>
</tr>
</tbody>
</table>
<h3>기관단총 (SMG)</h3>
<table>
<thead>
<tr>
<th>설정</th>
<th>권장 값</th>
<th>설명</th>
</tr>
</thead>
<tbody>
<tr>
<td>일반 감도</td>
<td>40-50</td>
<td>근거리 전투를 위한 높은 감도</td>
</tr>
<tr>
<td>ADS 감도</td>
<td>35-45</td>
<td>빠른 조준 전환에 유리</td>
</tr>
<tr>
<td>수직 감도 배율</td>
<td>1.0-1.2</td>
<td>균형잡힌 반동 제어</td>
</tr>
</tbody>
</table>
<h3>저격 소총 (SR)</h3>
<table>
<thead>
<tr>
<th>설정</th>
<th>권장 값</th>
<th>설명</th>
</tr>
</thead>
<tbody>
<tr>
<td>일반 감도</td>
<td>30-40</td>
<td>정밀한 조준에 적합</td>
</tr>
<tr>
<td>6x 스코프 감도</td>
<td>20-30</td>
<td>안정적인 원거리 조준</td>
</tr>
<tr>
<td>8x 스코프 감도</td>
<td>15-25</td>
<td>초정밀 원거리 사격 가능</td>
</tr>
</tbody>
</table>
</div>
<div class="setting-card">
<h2>고급 에임 향상 기법</h2>
<h3>FPP vs TPP 에임 설정</h3>
<p>시점에 따라 에임 설정을 조정하는 것이 효과적입니다:</p>
<ul>
<li><strong>FPP(1인칭):</strong> 약간 높은 감도가 유리 (일반 감도 +5 정도)</li>
<li><strong>TPP(3인칭):</strong> 기본 권장 감도 사용</li>
</ul>
<h3>그래픽 설정 최적화</h3>
<p>적을 더 쉽게 식별하고 에임을 향상시키기 위한 그래픽 설정:</p>
<ul>
<li><strong>안티앨리어싱:</strong> 중간 또는 높음 (적 식별에 중요)</li>
<li><strong>후처리:</strong> 매우 낮음 (화면 선명도 향상)</li>
<li><strong>그림자:</strong> 매우 낮음 (FPS 향상)</li>
<li><strong>시야각(FOV):</strong> 90-103 사이가 적당 (너무 높으면 적이 너무 작게 보임)</li>
</ul>
<h3>트레이닝 모드 활용법</h3>
<p>배틀그라운드의 트레이닝 모드에서 효과적으로 연습하는 방법:</p>
<ol>
<li><strong>반동 제어 연습:</strong> 벽에 대고 사격하여 반동 패턴을 익히세요.</li>
<li><strong>스프레이 제어:</strong> 30m 거리의 표적에 연사하며 탄착군 조절을 연습하세요.</li>
<li><strong>빠른 조준 전환:</strong> 서로 다른 거리의 표적들 사이를 빠르게 전환하며 조준하세요.</li>
<li><strong>이동 중 사격:</strong> 좌우로 움직이며 표적을 맞추는 연습을 하세요.</li>
</ol>
<div class="warning">
<h4>주의사항</h4>
<p>배틀그라운드는 무기마다 반동 패턴이 다릅니다. 자주 사용하는 무기 2-3개에 집중해서 완벽하게 익히는 것이 좋습니다.</p>
</div>
<h3>프로 선수들의 설정</h3>
<div class="pro-settings">
<div class="pro-player">
<img src="/api/placeholder/60/60" alt="프로 선수">
<div class="pro-player-info">
<div class="pro-player-name">ChocoTaco</div>
<p>DPI: 800 | 일반 감도: 37 | ADS 감도: 37 | 8x 스코프: 30</p>
</div>
</div>
<div class="pro-player">
<img src="/api/placeholder/60/60" alt="프로 선수">
<div class="pro-player-info">
<div class="pro-player-name">Kaymind</div>
<p>DPI: 400 | 일반 감도: 49 | ADS 감도: 41 | 수직 감도: 1.2</p>
</div>
</div>
<div class="pro-player">
<img src="/api/placeholder/60/60" alt="프로 선수">
<div class="pro-player-info">
<div class="pro-player-name">Shroud</div>
<p>DPI: 450 | 일반 감도: 50 | ADS 감도: 50 | 수직 감도: 1.0</p>
</div>
</div>
</div>
</div>
</div>
<footer>
<p>이 가이드는 참고용으로만 사용하시고, 자신에게 맞는 최적의 설정을 찾는 것이 중요합니다.</p>
<p>© 2025 오버워치2 & 배틀그라운드 에임 설정 기초가이드 By. Nekoi</p>
</footer>
</div>
<script>
// 탭 전환 기능
document.querySelectorAll('.tab-btn').forEach(button => {
button.addEventListener('click', () => {
// 모든 탭 버튼에서 active 클래스 제거
document.querySelectorAll('.tab-btn').forEach(btn => {
btn.classList.remove('active');
});
// 클릭된 버튼에 active 클래스 추가
button.classList.add('active');
// 모든 콘텐츠 탭 숨기기
document.querySelectorAll('.content').forEach(content => {
content.classList.remove('active');
});
// 해당 콘텐츠 탭 표시
const tabId = button.getAttribute('data-tab');
document.getElementById(tabId).classList.add('active');
});
});
// 오버워치 eDPI 계산 함수
function calculateOwEdpi() {
const dpi = parseFloat(document.getElementById('ow-dpi').value);
&n
첨부파일
게시글 목록
| 번호 | 제목 |
|---|---|
| 1188 | |
| 1187 | |
| 1186 | |
| 1185 | |
| 1177 | |
| 1176 | |
| 1173 | |
| 1152 | |
| 1150 | |
| 1146 | |
| 1145 | |
| 1141 | |
| 1140 | |
| 1138 | |
| 1137 | |
| 1136 | |
| 1133 | |
| 1132 | |
| 1130 | |
| 1128 | |
| 1126 | |
| 1121 | |
| 1116 | |
| 1114 | |
| 1111 | |
| 1094 | |
| 1093 | |
| 1089 | |
| 1086 | |
| 1084 |
댓글 작성
댓글을 작성하시려면 로그인이 필요합니다.
로그인하기